I needed to review a book for an assignment, so given that my topic is cooking, I chose College Cookbook: Dorm Eating and Apartment Feasting by David Poran. While we haven't yet gotten a chance to make any of the recipes in the book, my boyfriend and I have already marked a bunch that we'll be trying out soon. I've decided to do my book review as a comparison between the cookbook and my blog. Here we go!
College Cookbook:
• It has a spectacular introduction! The first four chapters are dedicated to kitchen and cooking basics from the appliances you'll need, and how to store food, to tips on staying healthy.
I'd like to take this time to point out that my biggest regret since starting this blog is not including an introductory post that explained the blog's purpose and covered some basic items. Mine would not have been nearly as comprehensive as the introduction to Poran's cookbook, but I think it would have been really helpful to my readers.
• It distinguishes between dorm food and apartment food, basically by level of difficulty and what is needed to prepare each dish.
This is something I never would have even considered, but will definitely come in handy next year since my boyfriend is graduating, and I'm staying in O'Hare with my best friend who is in RA.
• It covers everything. Breakfast, lunch, dinner, desserts, salads, soups, sides, dips, and more. There is even a chapter at the end about how to make homemade takeout! (Okay so that's an oxymoron, but I meant making the food you'd normally get as takeout in your own apartment.)
Flavors of Fordham:
• It's created by a college student for college students. So the majority of the recipes are easy and not terribly time consuming.
• You don't need more than the basic kitchen supplies to execute the recipes. While I love the introduction for College Cookbook, some of the recommended appliances in "Chapter 2: Great Gadgets" are a bit unnecessary for most college students. George Forman Grills and blenders are great, but things like mixers, food processors, rice cookers probably won't be used very often by college students.
• My blog caters to the Fordham area. There have been some (and there will be a few more) posts on places to get take out in the area surrounding the Rose Hill campus we know and love.
• It's personal. Poran's cookbook is definitely more informative and professional than my blog, but I never wanted my blog to be like that. I wanted to keep it lighter, funny at times, and keep a personal story going.
I feel that both my blog and Poran's cookbook have strengths and weaknesses. Obviously Poran's book is more extensive and boasts expertise in the culinary area, but my blog has a bit more of the college feel because I'm still living in the world of college cooking, where Poran's college days were spent learning to cook like a pro. My blog is nowhere near perfect, but hopefully with some help from Poran's cookbook, I can improve both in the kitchen and in the blogosphere.
Tuesday, April 17, 2012
Wednesday, April 11, 2012
French Toast
French toast is not my first choice of breakfast foods, but my boyfriend really wanted to make it one night so I agreed. It turned out better than I expected and tasted a lot better than I remembered (the last time I'd had French toast was about 12 years ago). I'm not a huge fan of cinnamon, but when it's all mixed together and smothered with syrup you can barely even tell. I've become a fan of French toast now, so if you're like me and haven't had it since you were a kid, I suggest it's about time to try making some for yourself and giving it another chance.
Ingredients
4 slices of bread (we used white bread)
2 eggs
Cinnamon
Syrup
Egg Whites (or just regular eggs if you prefer)
Hot sauce (or anything else you'd want on your eggs)
Here's how it's done:
• Crack the two eggs into a bowl and mix as if you were going to make scrambled eggs. Add some cinnamon into the bowl as well. (The amount really depends on how much you like cinnamon, but you shouldn't put in more than 3 tablespoons)
• Heat up a pan over a medium sized flame, put a little bit of butter in the pan or spray it with Pam.
• Dip the bread into the egg and cinnamon mixture, making sure the bread is completely coated on both sides.
• Put one of the egg coated pieces of bread into the pan (two if your pan is large enough) and let it cook for a minute or two. Lift it up with a spatula to check the bottom before flipping and cooking the other side for about the same amount of time. You want to cook it long enough so that it is browned a little, but not too long or else it will dry out.
Meanwhile:
• If you're using regular eggs you'll have to crack them into a bowl and scramble them first, but if you're using prepackaged egg whites you can just pour those into your pan.
• Heat up a pan over a medium sized flame, put a little bit of butter in the pan or spray it with Pam.
• Add your eggs to the pan and mix around continuously until they become little fluffy balls of egg. Make sure there is no liquid left before turning off the flame and removing your eggs!
• Add some hot sauce, ketchup, salt, pepper, or whatever else you can top eggs with!
Now cover your french toast in syrup - or if you're feeling adventurous you can try topping it with the strawberry syrup sauce I posted a few weeks ago - and enjoy :)
| Sorry about the photo - it was taken before I got everyone's feedback. Also, sorry my boyfriend took a bite out of it before I got to take the picture, he was really excited about his French toast! |
4 slices of bread (we used white bread)
2 eggs
Cinnamon
Syrup
Egg Whites (or just regular eggs if you prefer)
Hot sauce (or anything else you'd want on your eggs)
Here's how it's done:
• Crack the two eggs into a bowl and mix as if you were going to make scrambled eggs. Add some cinnamon into the bowl as well. (The amount really depends on how much you like cinnamon, but you shouldn't put in more than 3 tablespoons)
• Heat up a pan over a medium sized flame, put a little bit of butter in the pan or spray it with Pam.
• Dip the bread into the egg and cinnamon mixture, making sure the bread is completely coated on both sides.
• Put one of the egg coated pieces of bread into the pan (two if your pan is large enough) and let it cook for a minute or two. Lift it up with a spatula to check the bottom before flipping and cooking the other side for about the same amount of time. You want to cook it long enough so that it is browned a little, but not too long or else it will dry out.
Meanwhile:
• If you're using regular eggs you'll have to crack them into a bowl and scramble them first, but if you're using prepackaged egg whites you can just pour those into your pan.
• Heat up a pan over a medium sized flame, put a little bit of butter in the pan or spray it with Pam.
• Add your eggs to the pan and mix around continuously until they become little fluffy balls of egg. Make sure there is no liquid left before turning off the flame and removing your eggs!
• Add some hot sauce, ketchup, salt, pepper, or whatever else you can top eggs with!
Now cover your french toast in syrup - or if you're feeling adventurous you can try topping it with the strawberry syrup sauce I posted a few weeks ago - and enjoy :)
Monday, April 2, 2012
Empanadas
What are empanadas? They're basically the Latin American take on beef turnovers, or beef patties. I'm half Puerto Rican, so growing up I always assumed empanadas were a Puerto Rican thing, however, according to Wikipedia, the Internet's most reliable source, I have learned that quite a few different Latin countries, and even some other nations, have their own versions of this dish. Normally, an empanada would be fried, but my mother always used to bake them, so that is actually my preference because the fried ones seem greasy to me. Don't get me wrong though, they are still muy delicioso when fried, so if you've got a deep frier or some spare oil you're dying to use, you could try frying some of them to see which you prefer! Also, it would probably be wrong of me not to warn you of how time consuming making empanadas can become, especially if you're making a ton of them. I suggest having your friends help out, so you can get done faster and everyone gets to join in on the fun!
The empanadas can be eaten by themselves, but I recommend pairing them with rice and beans.
Ingredients
1 pound of chopped meat
1 packet of Sazón
Adobo
1 package of Goya discos grandes para empanadas
*There are a few things I want to point out here*
1. The discs are found in the freezer section of supermarkets. I bought mine at Modern on Arthur Ave. However, they don't carry them in my Stop & Shop at home, so depending on where you live they may be a bit difficult to find.
2. Goya makes discos and discos grandes (for those who don't know español that just means large discs). I used the discos grandes when I made these. With one pound of meat you can use an entire package of 10 discos grandes, but if you use the smaller discs you will need two packages of 10 in order to use up all of the meat.
3. In addition to the plain discs that I used, Goya also makes orange ones. Technically there is a difference, but I personally can't really taste it. So if the orange ones are all you can find, the resulting empanadas will be just as delicious.
Here's how it's done:
• First, make sure your discos are defrosted! They are impossible to use if they are still frozen.
(• If you're going to use the recipe I linked to earlier to make rice and beans with the empanadas, you should make the beans while you prepare the meat, and then make the rice while the empanadas are baking).
• In a medium pan cook the chopped meat thoroughly. Turn off gas once meat is fully cooked.
• Strain the grease out and put the meat back into the pan.
• Add the sazón and add some adobo to taste. Mix the seasonings around until they cover the meat as evenly as possible.
• Pre-heat your oven to 350°.
• Place one disc on an empty plate. Put meat on one half of the disc, and be sure to leave some space around the edges.
**Note: you don't want to pile the meat too high, or else your empanada will be difficult to close.
• Fold the empty part of the disc over the meat and match up the edges.
• Using a fork, press the sides together. Be sure to do this for entire half-circle, you don't want your empanada to pop open in the oven!
• Place your finished empanadas on a baking sheet, or pan to go into the oven.
• When all of your empanadas are ready, place them into the oven. Cook them for 10 minutes, flip them and then cook for another 10 minutes. Depending on the strength of your oven they may need an additional 5-10 minutes on each side.
• You'll know they're done when they have those golden marks on the top and bottom, like in the first picture.
**Note: They are basically little pockets of heat so make sure you let them cool off for a few minutes!
Once your empanadas have cooled off a bit and your rice and beans are ready, load everything up on your plate and enjoy :)
The empanadas can be eaten by themselves, but I recommend pairing them with rice and beans.
Ingredients
1 pound of chopped meat
1 packet of Sazón
Adobo
1 package of Goya discos grandes para empanadas
*There are a few things I want to point out here*
1. The discs are found in the freezer section of supermarkets. I bought mine at Modern on Arthur Ave. However, they don't carry them in my Stop & Shop at home, so depending on where you live they may be a bit difficult to find.
2. Goya makes discos and discos grandes (for those who don't know español that just means large discs). I used the discos grandes when I made these. With one pound of meat you can use an entire package of 10 discos grandes, but if you use the smaller discs you will need two packages of 10 in order to use up all of the meat.
3. In addition to the plain discs that I used, Goya also makes orange ones. Technically there is a difference, but I personally can't really taste it. So if the orange ones are all you can find, the resulting empanadas will be just as delicious.
Here's how it's done:
• First, make sure your discos are defrosted! They are impossible to use if they are still frozen.
(• If you're going to use the recipe I linked to earlier to make rice and beans with the empanadas, you should make the beans while you prepare the meat, and then make the rice while the empanadas are baking).
• In a medium pan cook the chopped meat thoroughly. Turn off gas once meat is fully cooked.
• Strain the grease out and put the meat back into the pan.
• Add the sazón and add some adobo to taste. Mix the seasonings around until they cover the meat as evenly as possible.
• Pre-heat your oven to 350°.
• Place one disc on an empty plate. Put meat on one half of the disc, and be sure to leave some space around the edges.
**Note: you don't want to pile the meat too high, or else your empanada will be difficult to close.
• Fold the empty part of the disc over the meat and match up the edges.
• Using a fork, press the sides together. Be sure to do this for entire half-circle, you don't want your empanada to pop open in the oven!
• Place your finished empanadas on a baking sheet, or pan to go into the oven.
• When all of your empanadas are ready, place them into the oven. Cook them for 10 minutes, flip them and then cook for another 10 minutes. Depending on the strength of your oven they may need an additional 5-10 minutes on each side.
• You'll know they're done when they have those golden marks on the top and bottom, like in the first picture.
**Note: They are basically little pockets of heat so make sure you let them cool off for a few minutes!
Once your empanadas have cooled off a bit and your rice and beans are ready, load everything up on your plate and enjoy :)
Wednesday, March 28, 2012
Fancy Funfetti
Last week my boyfriend decided to bake a funfetti cake. Easy enough...just follow the instructions on the box, and in about 30 minutes you have yourself a cake. However, he decided that plain funfetti cake would not do, especially since he forgot to buy frosting. So instead of going back to the store or just eating the cake plain, he made a syrupy strawberry sauce using frozen strawberries. It only took him a few minutes to make, and it really dressed up the entire funfetti cake!
Ingredients:
Frozen, whole strawberries (10-12)
Sugar (about 1 cup)
Here's how it's done:
• Put strawberries in a pan on medium heat.
• Pour sugar into pan over strawberries while stirring.
• Continue stirring (and adding sugar, if you want) until the strawberries are soft.
**Note: the whole process only takes about 5 minutes.
This entry was pretty short, but it's just a quick way to dress up a plain dessert! If you like it, try it out with other desserts like ice cream, or try cutting a hole in a cupcake and filling the inside with the strawberries!
Now just drizzle some of the sauce over your cake, and pour the rest with the strawberries on the side and enjoy :)
Ingredients:
Frozen, whole strawberries (10-12)
Sugar (about 1 cup)
Here's how it's done:
• Put strawberries in a pan on medium heat.
• Pour sugar into pan over strawberries while stirring.
• Continue stirring (and adding sugar, if you want) until the strawberries are soft.
**Note: the whole process only takes about 5 minutes.
This entry was pretty short, but it's just a quick way to dress up a plain dessert! If you like it, try it out with other desserts like ice cream, or try cutting a hole in a cupcake and filling the inside with the strawberries!
Now just drizzle some of the sauce over your cake, and pour the rest with the strawberries on the side and enjoy :)
Wednesday, March 21, 2012
Homemade Alfredo Sauce
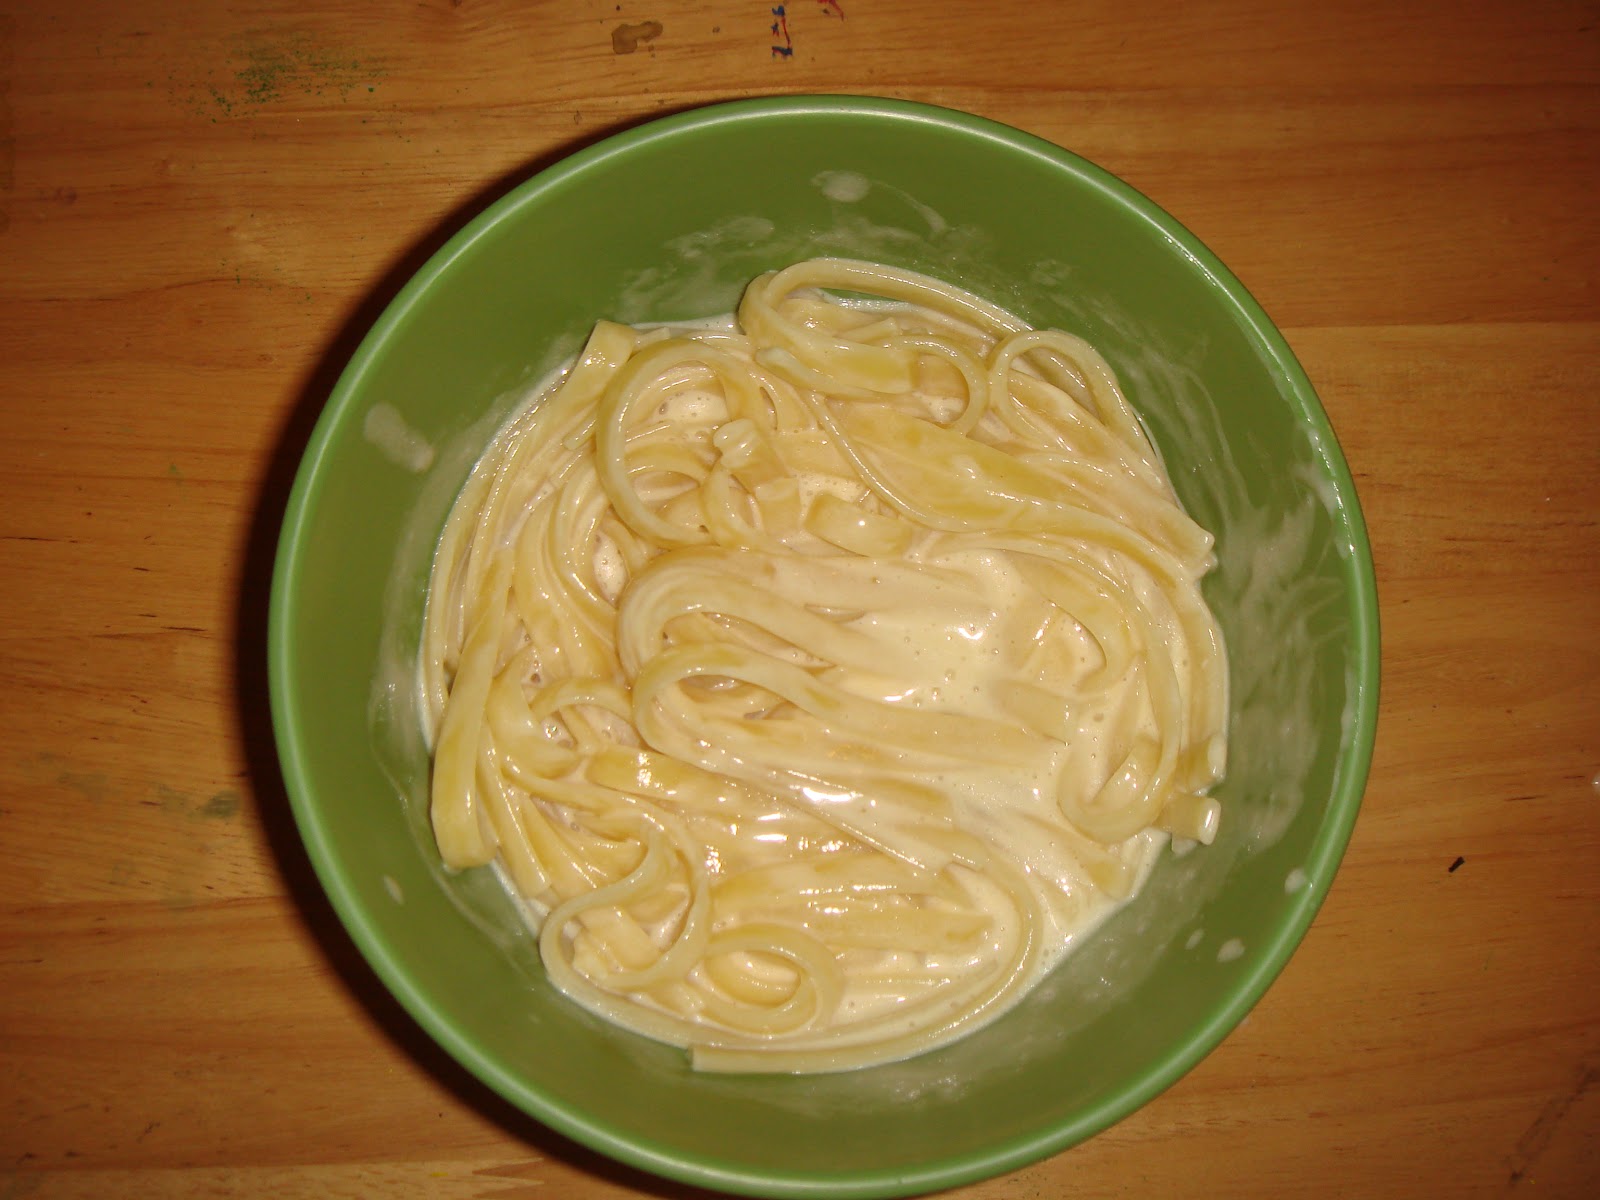
When I was little, fettuccini alfredo was my favorite thing to order at Italian restaurants. My boyfriend didn't have the same feeling about on my favorite dish, so when I brought him the recipe that I got from my boss he wasn't too willing to make it. One day last semester I was feeling sad, so he decided to surprise me and make the fettuccini for me...and now he loves it too! So maybe fettuccini was never your favorite dish as a child, but it's so simple to make that I definitely recommend trying out this recipe one night.
** This recipe makes enough for two people, but you can always double or triple the ingredients if you have more people to impress with your culinary skills!
Ingredients:
1 cup heavy cream
6 tbsp butter
Fettucini pasta
Salt
Here's how it's done:
• In a medium sauce pan, melt the butter down.
• Add the heavy cream and mix the two.
• Let simmer for about 10 minutes, stirring occasionally.
• Note: you want the sauce to thicken a bit before adding the pasta.
• Another note: if the sauce appears too buttery, you can add some more heavy cream.
Meanwhile:
• Bring water to boil in a pot large enough to hold desired amount of pasta.
• Once water is boiled, pour penne in.
• Cook for about 5-8 minutes, or until the pasta is as soft as you'd like it.
• Strain immediately (pasta will continue to cook in the hot water).
** This recipe makes enough for two people, but you can always double or triple the ingredients if you have more people to impress with your culinary skills!
Ingredients:
1 cup heavy cream
6 tbsp butter
Fettucini pasta
Salt
Here's how it's done:
• In a medium sauce pan, melt the butter down.
• Add the heavy cream and mix the two.
• Let simmer for about 10 minutes, stirring occasionally.
• Note: you want the sauce to thicken a bit before adding the pasta.
• Another note: if the sauce appears too buttery, you can add some more heavy cream.
Meanwhile:
• Bring water to boil in a pot large enough to hold desired amount of pasta.
• Once water is boiled, pour penne in.
• Cook for about 5-8 minutes, or until the pasta is as soft as you'd like it.
• Strain immediately (pasta will continue to cook in the hot water).
And then:
• Once both fettuccini and alfredo sauce are are ready, combine them in the saucepan.
• Stir the fettuccini around the pan to make sure it all gets coated with sauce.
Like I said before, fettuccini alfredo is a really quick and easy dish, and it's perfect for a romantic night in or feeding all of your friends and family! You can even add grilled chicken or shrimp to the pasta if you like, both go well with the alfredo sauce. And as always, once you're done cooking serve up for food and enjoy :)
Wednesday, March 14, 2012
Cooking Adventures with Guy Fieri
Last week my friends & I decided to have some fun with burgers with a little help from Food Network star, Guy Fieri. My boyfriend & I had previously seen an episode of his cooking show where he made inside out burgers so we wanted to try it out for ourselves. It's easier to have Guy explain it to you as he does it, so here's the clip from his show!
I stuffed mine with bacon & mozzarella cheese. My friend had bacon, mozzarella & onion in hers. My boyfriend & our other friend stuffed theirs with bacon, mozzarella, onion & peppers. If should be noted that when making the two halves of the burgers you shouldn't make two full sized patties, or you'll end up with a wambo burger like my friend.
| Stuffing the burgers with bacon. |
| My friend's completed burger with bacon, mozzarella, onion & pepper inside, and tomato & lettuce on top. |
To accompany our delicious inside out burgers, we used my boyfriends deep frier to make double-fried french fries (yet another idea taken from Guy Fieri). The trick is to fry the potatoes once, take them out & let them cool, and then fry them again to make them extra crispy. If you don't have a deep frier you can always pour a bit of oil into a regular pan (enough to coat the bottom & then some) and heat that up enough to fry your potatoes in there! It's almost the exact same as using a deep frier, just a bit more difficult to do.
Get creative with the "toppings" for your inside out burger! Be daring with your cheeses & test out different combinations of flavors. Stuff your burgers to your heart's content, cook your fries to a crispy gold brown & enjoy :)
Tuesday, March 6, 2012
Chili: Quick & Easy Dinner
Chili is a great dish because you can feed a lot of people easily or you can save it for another time if you're just cooking for you. The other night I (not my boyfriend this time - shocking I know!) cooked dinner for my friends. I decided to make chili because it's so easy - there are only a few ingredients and it all takes about 20 minutes to make!
**The recipe below is for two pounds of chili, but in parentheses I added what you would need to make only one pound.
Ingredients:
2 pounds of chopped meat (or 1lb)
Adobo
Two packets of sazón (or 1 packet)
3 8oz containers of Ortega Taco Sauce (or 2 containers)
1 can of red kidney beans
Rice (or anything else you'd like to pair your chili with)
Mexican cheese (if you like cheese)
Here's How it's Done:
• In a medium pan cook the chopped meat thoroughly. Turn gas off once meat is fully cooked.
• Strain the grease out and put the meat back into the pan.
• Add the sazón and add some adobo to taste. Mix the seasonings around so they cover the meat as evenly as possible.
• Open the can of beans, strain and rinse them, and add them to the meat.
• Add in both containers of taco sauce and mix everything around.
• Heat the chili over a low-medium flame for about 5-10 minutes, stirring occasionally.
Meanwhile:
• In a small pot, boil water for rice. Once water is boiling, put bag of rice in the pot. Remove the rice when the water boils again (about 10 minutes).
While the rice and the chili are still hot, put some in your bowl and add the taco cheese. Mix the cheese around with the rice and chili so it melts and enjoy :)
**The recipe below is for two pounds of chili, but in parentheses I added what you would need to make only one pound.
Ingredients:
2 pounds of chopped meat (or 1lb)
Adobo
Two packets of sazón (or 1 packet)
3 8oz containers of Ortega Taco Sauce (or 2 containers)
1 can of red kidney beans
Rice (or anything else you'd like to pair your chili with)
Mexican cheese (if you like cheese)
Here's How it's Done:
• In a medium pan cook the chopped meat thoroughly. Turn gas off once meat is fully cooked.
• Strain the grease out and put the meat back into the pan.
• Add the sazón and add some adobo to taste. Mix the seasonings around so they cover the meat as evenly as possible.
• Open the can of beans, strain and rinse them, and add them to the meat.
• Add in both containers of taco sauce and mix everything around.
• Heat the chili over a low-medium flame for about 5-10 minutes, stirring occasionally.
Meanwhile:
• In a small pot, boil water for rice. Once water is boiling, put bag of rice in the pot. Remove the rice when the water boils again (about 10 minutes).
While the rice and the chili are still hot, put some in your bowl and add the taco cheese. Mix the cheese around with the rice and chili so it melts and enjoy :)
Subscribe to:
Posts (Atom)